
How to Remove Makeup Properly (Without Damaging Your Skin)
Published
15 May, 2026
Makeup removal is one of those steps in a skincare routine that most people assume they are already doing correctly. It seems simple enough: apply something, rinse it off, move on. But the reality is that how makeup is removed determines far more about skin health than most people realise. The formula chosen, the pressure applied, the water temperature used, and the order of steps all have measurable consequences - for the skin barrier, for hydration, and for how well everything else in the routine performs.
This guide covers the full picture: common mistakes and why they matter, the correct step-by-step removal method, how to approach different makeup types, how to match removal products to skin type, and what to do immediately after cleansing. For those wearing layered or full-coverage looks, a second cleanse may be relevant - this is covered separately in The Complete Skincare Routine Guide. Before the correct method, though, understanding the most common mistakes is the fastest route to fixing them.
The Biggest Makeup Removal Mistakes That Damage Your Skin
Most skin concerns that appear during the day - persistent dryness, sensitivity, clogged pores, dullness - have their roots in habits that go unexamined. The cleansing step is where many of those habits live. Getting it wrong does not just leave makeup on the skin; it actively works against the skin’s natural ability to function well. These are the mistakes that matter most.
Rubbing and Dragging the Skin
Physical friction during makeup removal is one of the most overlooked contributors to skin barrier damage. It rarely feels aggressive in the moment, which is precisely why it tends to go unchecked. The instinct, when a cleanser is not shifting product efficiently, is to apply more pressure. That instinct is understandable, but it is also where the damage accumulates.
A clinical study published in the Journal of Cosmetic Dermatology (Hosokawa et al., 2021) examined 35 female subjects over four weeks and found that switching to a higher-cleansing-ability product - one that required less mechanical friction to remove makeup - led to significant decreases in dryness, scaling, irritation, redness, and itchiness. Transepidermal water loss (TEWL) also decreased measurably. The conclusion is clear: many people are rubbing harder than they realise because their cleanser is not doing enough of the work. The problem is not effort - it is formula.
Using a product that dissolves makeup through chemistry rather than friction means the skin needs far less mechanical input to become clean. The goal is to let the formula do the work, not the hand.
Using Face Wipes as a Primary Removal Method
Face wipes are convenient. They are also, as a primary removal method, largely ineffective. The core issue is that wipes do not lift and remove makeup - they primarily redistribute it across the surface of the skin. Waterproof formulas and SPF residue in particular are not broken down by a wipe; they are moved around. After wiping, a significant amount of product remains on the skin, concentrated in certain areas and thinly spread across others.
Compounding this, wipes leave behind chemical residues from their own formulation, and the act of wiping requires friction - the same mechanical input that, as the clinical evidence shows, causes measurable damage to the skin barrier over time. They are not without a place in a kit - as a temporary measure in situations where proper cleansing is genuinely not possible - but they are not a substitute for thorough cleansing. For a fuller explanation of why, here is why they are worth rethinking.
Only Using a Water-Based Cleanser on Waterproof or Long-Wear Makeup
Chemistry matters here in a way that is easy to overlook. Waterproof makeup and SPF formulas are built to resist water. They use film-forming polymers and oil-based ingredients specifically designed to stay put through sweat, humidity, and environmental exposure. A water-based cleanser - whether foam, gel, or micellar - cannot break these formulas down efficiently. Running one across a full face of long-wear foundation or waterproof mascara will lift some surface-level product, but it will leave residue behind, particularly around the hairline, jaw, and eye contour.
An oil-based first cleanser is not optional when wearing these formulas. Oil dissolves oil - this is the fundamental chemical principle that makes an oil-based product the correct choice for the first cleanse when makeup or SPF is involved. This is the principle behind double cleansing, which is covered in full in The Complete Guide to Double Cleansing.
Washing with Hot Water
Hot water feels thorough. It feels as though it must be doing a better job than lukewarm water - opening pores, cutting through residue, rinsing more cleanly. In reality, hot water strips the natural oils that keep the skin barrier intact. As the Cleveland Clinic explains, the skin barrier is a lipid-rich structure, and heat behaves toward those lipids the way it behaves toward butter on a warm surface - it melts and disrupts them. What is left is skin that feels temporarily tight, stripped, and more prone to both dehydration and sensitivity.
Warm water is entirely sufficient for emulsifying a cleansing balm and rinsing it thoroughly. It does the job without the cost. If hot water has been a regular habit and skin feels consistently tight or dull after cleansing, understanding dehydrated skin will help explain why - and what to do about it. For a broader look at why the barrier deserves protection at every step, what your skin barrier is and how to protect it covers the topic in full.
Treating the Eye Area Like the Rest of the Face
The skin around the eyes is among the thinnest on the entire face. It has fewer oil glands, less structural collagen support, and is under near-constant mechanical stress from blinking - hundreds of thousands of times each year. It is also the area that typically carries the heaviest, most pigmented, and most waterproof product: mascara, liner, shadow.
The combination of stubborn product and delicate skin creates a specific problem when approached with the wrong technique. Rubbing a cotton pad across the eye area to shift waterproof mascara causes micro-inflammation in the tissue, weakens delicate capillaries, and - over time - contributes to fine lines and sensitivity in the area. The correct approach requires patience rather than pressure: pressing and holding rather than dragging. The technique is covered step by step in the following section.
Having identified the habits that quietly undermine skin health during the removal step, it becomes clear that technique and formula choice are equally important. The next section provides the correct process from beginning to end.
The Right Way to Remove Makeup: A Step-by-Step Guide
Getting the removal step right is not complicated, but it is specific. The five steps below form the complete, correct process for removing makeup thoroughly and gently - regardless of makeup type, coverage level, or skin type.
Step 1: Start with an oil-based cleanser on completely dry skin
Oil dissolves oil. This is the chemical principle that makes an oil-based formula the right starting point for any cleansing routine that involves makeup or SPF. The key detail that is often missed is that both the face and the hands must be completely dry before application. Water repels oil - if there is any dampness on the skin or hands, the balm cannot make proper contact with the makeup and the formula’s effectiveness is immediately reduced.
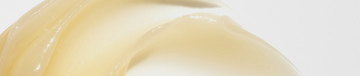
The Oat Cleansing Balm 150ml is clinically proven to remove 100% of waterproof makeup and SPF in 30 seconds. Its formulation combines 5% Oat Kernel Oil with a ceramide-rich base, which means it is not only dissolving makeup - it is actively supporting the skin barrier during the removal process. The two functions happen simultaneously.
Clinically proven to remove 100% of waterproof makeup and SPF in 30 seconds.
For those wanting to try the formula before committing to the full size, the Mini Oat Cleansing Balm 50ml is a practical starting point.
Step 2: Begin with the eyes and lips
Always start on the areas carrying the heaviest, most pigmented, and most stubborn product. Apply a small amount of balm directly to closed eyelids and press gently with the fingertips. Hold for a full five seconds without any movement. This dwell time is where the formula does its work - the oil penetrates and dissolves mascara, liner, and shadow before any physical movement begins. After five seconds, sweep gently downward with minimal pressure. Do not rub side to side.
If mascara remains after the first pass, the correct response is to repeat the press-and-hold - not to increase friction. The same approach applies to the lip area, where long-wear and matte formulas can be equally resistant to water-based cleansing.
Step 3: Work across the face with gentle circular motions
After the eye and lip areas are clear, apply additional balm across the rest of the face if needed and begin massaging in slow, upward circular movements. The goal of this motion is distribution, not friction - the circular massage moves the formula across the skin’s surface to ensure full coverage and contact with all remaining makeup. The balm is doing the chemical work.
Around 60 seconds of gentle massage is sufficient for most looks. Pay particular attention to the hairline, the sides of the nose, and the jawline - areas where foundation, SPF, and concealer tend to accumulate and are frequently missed during cleansing. If product feels stubborn, the answer is more time and more formula, not more pressure.
Step 4: Emulsify with warm water and rinse thoroughly
Add a small splash of warm water to the balm while it is still on the skin. The formula transforms - shifting from a balm texture into a lightweight, milky consistency. This emulsification is what lifts the dissolved makeup from the skin’s surface and carries it away during rinsing. Massage gently for 10 to 15 seconds after adding water, then rinse thoroughly until no slippery residue remains.
Pat the skin dry with a clean, soft cloth. Do not rub.
Step 5: Follow with a second cleanse if skin needs one
For those wearing waterproof makeup, long-wear formulas, or heavy SPF - or for those with oily or blemish-prone skin - a water-based second cleanse ensures no residue is left on the skin’s surface. The right second cleanser depends on skin type, which is covered in the following section. For the full double cleansing method and where it fits in a complete routine, The Complete Guide to Double Cleansing is the most comprehensive resource. The full cleansers collection is also a useful reference for finding the right second cleanser match.
The five-step process above is the foundation. But different makeup types have specific removal considerations that are worth understanding in detail.
How to Remove Different Types of Makeup Properly
Not all makeup presents the same removal challenge. A sheer tinted moisturiser behaves very differently from a full-coverage waterproof foundation, and waterproof mascara is a different problem entirely from a soft powder eyeshadow. Understanding what makes each formula resistant - and how to address that resistance correctly - makes the removal step more efficient and less damaging.
Waterproof mascara and waterproof eye makeup
Waterproof formulas are designed specifically to resist water. They use film-forming polymers that create a flexible, water-resistant coating around each lash - and only oil-based chemistry can break that structure down reliably. No amount of water, micellar solution, or gentle friction will dissolve a waterproof mascara; the molecular composition simply does not allow it.
Apply the Oat Cleansing Balm directly to closed eyes. Press gently with the fingertips and hold for a full five seconds without any movement. This dwell time is where the chemistry happens - the oil penetrates the polymer film and begins to dissolve it. After five seconds, sweep gently downward in a single motion. If mascara remains, repeat the press-and-hold sequence rather than increasing pressure or rubbing. The technique is identical for eyeshadow, liner, and brow products: press, hold, sweep - no dragging across the delicate eye area.
Long-wear foundation and full-coverage base
Long-wear foundation is formulated to outlast sebum production, sweat, and environmental exposure throughout the day. That longevity is achieved through film-forming ingredients and oil-resistant polymers that water-based cleansers cannot dissolve reliably. Applying a foam or gel cleanser to a full face of long-wear foundation will remove some surface product but will leave a meaningful layer of residue behind - particularly around the hairline, jaw, and sides of the nose.
Massage the balm across the full face using the circular technique, paying deliberate attention to those accumulation areas. Give the product time to work: 60 seconds of thorough massage followed by full emulsification and a complete rinse should lift even heavy, full-coverage formulas without requiring significant pressure.
SPF layered under makeup
SPF residue is one of the most underappreciated removal challenges in a modern skincare routine. Mineral and hybrid SPF formulas in particular leave a physical film on the skin - a film that water-based cleansers do not fully break down. That residue, if left on the skin overnight, sits on the surface during the skin’s natural repair and renewal processes, contributes to congestion, and can interfere with the absorption of subsequent skincare products.
For a full breakdown of why SPF is a non-negotiable in the daytime routine, the Essential Guide to Suncare and SPFcovers the topic comprehensively. From a removal standpoint, the approach is the same as for waterproof makeup: apply balm to completely dry skin, massage for a full 60 seconds, emulsify with warm water, and rinse thoroughly. The oil-based chemistry dissolves SPF residue through formula rather than friction.
Heavy, glam, or layered stage makeup
Full-glam or stage looks - those built up through multiple layers, specialist formulas, or extended-wear products - require more time in the first cleanse, not more pressure. Spend up to 90 seconds massaging the balm thoroughly across the face, giving particular attention to areas where product has been layered most heavily. Rinse completely, then follow with a water-based second cleanse matched to skin type. The principle does not change; only the time investment increases.
Removing makeup without a dedicated makeup remover
There is a common assumption that effective makeup removal requires a separate, dedicated remover applied before a cleanser. That assumption is worth revisiting. The Oat Cleansing Balm functions as a complete removal and cleansing step in one - not a workaround or a compromise, but often the superior option. It dissolves makeup and SPF while actively supporting the skin barrier in the same step, eliminating the need for a separate product and reducing the total amount of mechanical input the skin receives. For a fuller look at the broader capabilities of the Oat Cleansing Balm, that resource covers its range of applications in detail.
Makeup type is one axis of the decision. Skin type is the other, and the two need to be considered together when choosing the right product combination.
Choosing the Right Makeup Remover for Your Skin Type
Skincare is not one-size-fits-all, and makeup removal is no exception. The needs of dry, sensitive skin differ meaningfully from those of oily or blemish-prone skin - and the cleansing step should reflect that. The first cleanse, however, is consistent: an oil-based balm is the right starting point for every skin type. The decision-making comes in at the second cleanse, where personalisation matters. For a broader overview of how to match a cleanser to your skin’s specific needs, choosing the right cleanser for you covers the decision in detail.
For all skin types: the first cleanse
The Oat Cleansing Balm 150ml is non-comedogenic, dermatologically tested, and formulated with 5% Oat Kernel Oil alongside a ceramide-rich base. It is suitable as a first cleanse for every skin type without exception - including oily and blemish-prone skin, which is often the pairing that gives people pause.
The hesitation around using an oil-based product on oily or blemish-prone skin is understandable, but it rests on a misunderstanding. A well-formulated oil-based first cleanser does not cause breakouts - it removes the product layers that, if left on skin overnight, create the conditions for breakouts to develop. The problem is not the oil in the cleanser; it is the makeup, SPF residue, and excess sebum left on the surface when removal is incomplete.
Dry or sensitive skin
For dry or sensitive skin types, the Oat Cleansing Balm can serve not only as the first cleanse but, in many cases, as the only cleanse. Its ceramide content supports the structural integrity of the skin barrier, and it is clinically proven to hydrate skin for up to 12 hours - meaning the cleansing step actively contributes to skin health rather than depleting it. For those whose skin reacts to many products, the best cleanser for sensitive skin guide is a useful companion resource.
Normal or combination skin
A two-step cleanse tends to benefit normal and combination skin types, particularly when wearing makeup or SPF regularly. The first step - the Oat Cleansing Balm - handles the oil-soluble layers. The second step addresses any remaining residue and brings the skin to a clean baseline.
The Milk Cleanser 180ml is a strong pairing for normal and combination skin as a second cleanse. Formulated with 5% Rice Milk and Hyaluronic Acid, it has a hydrating character that leaves skin feeling balanced and comfortable after both steps rather than stripped or tight. Aim for at least 60 seconds of total cleansing time across both steps combined.
Oily or blemish-prone skin
The Oat Cleansing Balm as the first cleanse lifts makeup, SPF, and excess sebum from the surface. The second cleanse for oily or blemish-prone skin does more active work. The Salicylic Acid Cleanser 150ml contains 2% Salicylic Acid - a beta-hydroxy acid that is oil-soluble and therefore able to penetrate into pores, where it helps to clear congestion and manage oil production without stripping the skin’s surface moisture.
For blemish-prone skin, thorough makeup removal is especially important. Leftover product - particularly long-wear foundation and SPF residue - sits on the surface and within pores during the hours when skin does its natural renewal work. That combination directly creates the conditions for congestion and breakouts. For a broader guide to what works and what to avoid for oily skin, the best and worst ingredients for oily skin is essential reading alongside this pairing.
A practical note: aim for at least 60 seconds of cleansing across both steps combined - and browse the full cleansers collection to explore every option across skin types and concerns.
Getting the removal and cleansing step right is the foundation. But what happens in the minutes immediately after rinsing is where the rest of the routine begins, and it matters more than most people realise.
What to Do Straight After Removing Your Makeup
The cleansing step gets the skin to a clean baseline. What happens in the two to three minutes that follow determines how well everything applied afterwards performs. The skin after cleansing is at its most receptive - the surface is clear, pathways for absorption are open, and there is an opportunity to deliver active ingredients with maximum efficiency. Most people leave this window unused.
Hydrate immediately on damp skin
Water evaporates from the skin’s surface quickly after cleansing. The slight dampness that remains immediately after rinsing is a meaningful asset, not an inconvenience. Applying a hydrating serum to skin that is still slightly damp allows the formula to bind surface moisture before it escapes - amplifying the hydrating effect without requiring any additional product.
The Hyaluronic Acid Serum 30ml is formulated with 2% Pure Hyaluronic Acid at three molecular weights, delivering hydration across multiple levels of the skin - surface, mid-layer, and deeper. Applied while the skin still feels slightly damp from rinsing, it draws that residual moisture into the skin’s surface rather than allowing it to evaporate. Press gently rather than rubbing to apply - the same principle of minimal friction that applies throughout the cleansing step continues here.
Support and restore the skin barrier
Even the gentlest cleansing technique places some demand on the skin barrier. For those who wear heavy or full-coverage makeup regularly, or whose skin tends toward sensitivity or reactivity, targeted barrier support after cleansing is worth building into the routine as a consistent step rather than an occasional measure.
The Ectoin HydroBarrier Serum addresses both aspects of barrier health in a single product: 2% Ectoin, 2.5% Hyaluronic Acid, and 1% Barrier Blend comprising three ceramides. Applied after cleansing and before moisturiser, it addresses the structural integrity of the skin barrier alongside hydration - the two things most likely to need support after a thorough cleanse. For more context on why the barrier is worth prioritising at this step, this guide on the skin barrier explains the science clearly.
Build the rest of your routine
After the cleansing step and the first serum, the remainder of the routine follows in the usual order - additional serums, moisturiser, and SPF in the morning. The reason the cleansing step matters so much to what follows is straightforward: a genuinely clean skin surface allows subsequent products to penetrate and perform more effectively. Serums absorb more efficiently. Moisturiser creates a more consistent barrier. A cleanser that leaves residue, or a removal method that leaves makeup behind, limits the performance of every single product applied afterwards - regardless of how well those products are formulated.
If you are building or refining your routine beyond the cleansing step, how to build your skincare routine is the most comprehensive starting point for every skin type. The Complete Skincare Routine Guide provides a full framework for structuring a routine from first cleanse to last step, and the Complete Skincare Concerns Guide is a useful resource for anyone addressing specific skin concerns alongside their routine.
Common Makeup Removal Questions, Answered
Can I remove makeup without a makeup remover?
Yes - a cleansing balm functions as a complete makeup removal and cleansing step in one. The Oat Cleansing Balmremoves 100% of waterproof makeup and SPF - it is not a substitute for a dedicated remover but an improvement over one. A separate makeup remover followed by a cleanser involves two products, two application steps, and double the mechanical input on the skin. A well-formulated balm handles both in a single step, with less friction. If your current approach involves face wipes, those are worth rethinking for the reasons covered earlier in this guide.
What is the best way to remove waterproof mascara?
Apply an oil-based product directly to closed eyes. Press gently with the fingertips and hold for a full five seconds without moving - this dwell time is where the formula dissolves the waterproof polymer structure. After five seconds, sweep gently downward in a single motion. If mascara remains, repeat the press-and-hold sequence. Never rub side to side across the eye area. Patience and repetition are the correct response to stubborn mascara, not increased pressure or friction.
Is it bad to sleep with makeup on?
Yes. Makeup left on overnight sits on the skin’s surface during natural repair and renewal processes. It traps pollutants absorbed throughout the day against the skin rather than allowing them to be washed away. In blemish-prone skin, it contributes to congested pores. Over time, as a consistent habit, sleeping in makeup contributes to dehydration, uneven texture, and accelerated ageing. It is not a catastrophe on an occasional basis, but as a regular pattern, it works directly against everything the skincare routine is trying to achieve.
How often should I clean my makeup brushes and tools?
Brushes used for foundation and concealer should be cleaned at least once a week. Eye tools and sponge applicators warrant more frequent cleaning given how close they are used to the eye area and how much product they retain. The condition of the tools that apply makeup directly affects the condition of the skin they are applied to - residue and bacteria left on brushes transfer to the skin with each use.
Does the way I remove makeup affect how my skin ages?
Technique does matter, and the evidence supports this. The clinical study by Hosokawa et al. demonstrated that repeated friction during cleansing - even at levels that feel mild in the moment - leads to measurable increases in dryness, irritation, redness, and TEWL. Chronic low-level inflammation accumulates over time and contributes to sensitivity, uneven texture, and fine lines. Using a formula powerful enough to dissolve makeup without requiring significant mechanical friction is a long-term investment in skin health - not a minor detail.
How do I properly remove eye makeup specifically?
Use an oil-based product - water-based formulas cannot dissolve waterproof eye makeup reliably. Press and hold rather than rubbing; this is the single most important technique adjustment for the eye area. Sweep gently downward rather than dragging side to side. Be patient with stubborn mascara rather than aggressive - repeating the press-and-hold is always the right response. The eye area is too delicate and too constantly in motion to absorb the kind of repeated friction that many people apply to it without thinking.
Removing Makeup Properly: What to Take Away
Makeup removal done well is specific rather than complicated. The variables that matter - formula type, skin and hand dryness, water temperature, pressure applied, time allowed - are straightforward once understood, and the difference in outcome is measurable. An oil-based first cleanser on dry skin is not a preference or a trend; it is the chemically correct choice for removing oil-soluble makeup and SPF without friction. Warm water preserves the natural lipid barrier that hot water strips. Giving the formula time to dissolve what it needs to dissolve, rather than compensating with pressure, protects the skin barrier that makes every other step in the routine possible.
The format of the first cleanser is not a minor detail. It is the variable that determines whether the cleansing step actually works - whether waterproof makeup is dissolved or redistributed, whether SPF residue is lifted or left behind, whether the skin barrier is supported or depleted. An oil-based balm is the right tool because it dissolves makeup and SPF through chemistry, supports the barrier through its formulation, and requires less mechanical input from the hands. The second cleanse, where relevant, should be matched to skin type - and applied with the same principle of minimal friction and maximum formula contact.
After cleansing, the skin’s receptivity is at its peak. Applying hydration immediately while skin is still slightly damp, and supporting the barrier where needed, are the steps that turn a clean surface into an actively healthy one. If hot water and rough removal habits have been part of the routine for some time and skin feels consistently tight, dull, or reactive after cleansing, our dehydrated skin guide explains the signs, causes, and how to address them.
Proper makeup removal is not complicated. Getting the specifics right makes everything that follows more effective - and protects the skin that all of it is intended to improve.
Shop the Oat Cleansing Balm 150ml, clinically proven to remove 100% of waterproof makeup and SPF in 30 seconds. Prefer to try before committing? Start with the Mini Oat Cleansing Balm 50ml.
Not sure where to go next in your routine? The Complete Skincare Routine Guide has everything you need to build a full routine around your cleansing step.
Ready to find the right second cleanser? Browse all cleansers to find the match for your skin type.
