



Can You Wear Pimple Patches Under Makeup? How to Do It Properly
Yes, you can wear pimple patches under makeup - here is how to apply them, layer foundation over the top, and keep spots covered and healing all day.
Author
askINKEY skincare advisor
Published
20 October, 2026
Time to read
16 minutes
Yes, you can wear pimple patches under makeup, and the secret is almost entirely about the order you apply things and the technique you use. If you place the patch on clean, dry skin first and build your makeup on top of it the right way, you can treat a spot and conceal it at the same time without a visible lump or a peeling edge. In this guide we will cover the correct order for patches and makeup, a foolproof step-by-step application method, how to layer foundation and concealer over a patch without it piling, the common mistakes that make a patch show through, and a simple routine to support clearer skin. Because our patches are ultra-thin and virtually invisible on all skin tones, the real goal is to treat and conceal in one quiet, confident step.
The very first thing to get right is the order, so let us settle that before anything else.
The Short Answer: Yes, If You Apply Them the Right Way
Here is the definitive answer, up front and without hedging: yes, you can wear a pimple patch under makeup, and a well-applied patch will carry on working while it stays hidden. It is not a case of choosing between treating a spot and covering it. Done properly, you get both at once. The patch sits flat against the skin, draws at the blemish underneath, and your makeup goes on over the top so that no one, including you in the mirror, has to look at a lump that announces itself.
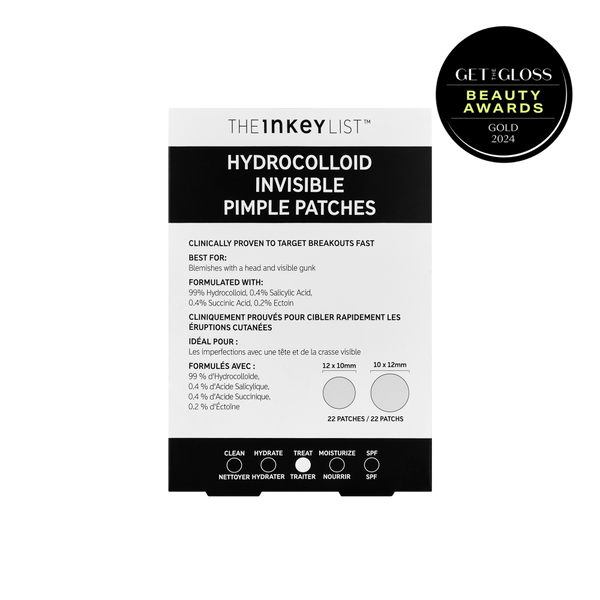
The reason this works so well with our Hydrocolloid Invisible Pimple Patches comes down to how thin and discreet they are. They are designed to be ultra-thin and virtually invisible on all skin tones, so once a patch is sealed to the skin it more or less disappears into the surface. That matters enormously when you plan to put foundation and concealer on top, because a thick or chunky patch creates a visible edge that no amount of clever blending can fully hide. A barely-there patch, by contrast, gives your makeup a smooth, low-profile base to sit on.
The goal is simple: treat the spot and conceal it at the same time.
It also helps to understand, in brief, what is actually working underneath. Our patches rely on three ingredients doing three complementary jobs. The patch is 99% hydrocolloid, the moisture-absorbing material that draws out excess fluid from the spot and helps to flatten it. There is 0.4% Salicylic Acid, which helps to unclog the pore so the blemish has somewhere to go. And there is 0.4% Succinic Acid, which helps to calm redness and excess oil around the area. You do not need to become an expert in any of this to use a patch well, but it is worth knowing that the patch is genuinely doing something while it hides under your makeup, rather than simply acting as a sticker.
We will not re-explain the full science here, because we have a dedicated piece for exactly that. If you want the deeper mechanism, including why a patch turns white and what that white gunk actually is, read how hydrocolloid patches work. This article stays focused on the practical question you came here to answer: how to wear a patch under makeup and get a clean, invisible finish every time.
A quick word on expectations, because honesty is the whole point of a guide like this. A patch is a targeted tool for an individual blemish, not a full-face treatment. It is brilliant on a single raised spot, a whitehead, or a breakout that has come to a head. It is not something you dot all over the place or expect to transform your skin overnight. Think of it as the precision step in your routine, the one you reach for when a particular spot needs attention and you still want to get on with your day looking like yourself.
There is also a reassuring practicality to all this. Our patches come in a Pack of 22 for £9, which means you are not rationing them. You can use a fresh one whenever you need it, which, as we will see later, matters a great deal for getting a proper seal. Spots rarely give you much notice, so having patches on hand turns a sudden breakout from a small crisis into a two-minute fix.
The reason we keep returning to the order of application is that it is genuinely the make-or-break detail. People who struggle to wear patches under makeup almost always run into trouble not because the patch is bad or their makeup is wrong, but because something went on in the wrong sequence. So the natural next question, and the one that causes the most confusion, is a simple one about timing.
Do You Put a Pimple Patch Before or After Makeup?
Before. Always before. The patch goes on first, directly onto clean, dry, product-free skin over the spot, and your makeup goes on top of it and around it afterwards. If you remember nothing else from this article, remember that single sentence, because it prevents almost every problem people have with patches and makeup.
Do I put a pimple patch before or after makeup? Before makeup. Cleanse, dry the area, place the patch on the bare spot, and only then start your makeup.
Should I put a pimple patch before or after makeup? Before, every time. Applying a patch over foundation, concealer, powder or any other product means it has nothing clean to grip, so it will not stick properly and it will not work.
The reason comes down to how hydrocolloid behaves. The material needs direct contact with your skin and with the surface of the spot in order to adhere and to do its job. Hydrocolloid is drawn to moisture and fluid at the blemish, and it forms a seal against clean skin that holds for hours. The moment you put anything between the patch and your skin, you break that contact. Serums, facial oils, moisturiser, primer, sunscreen, foundation, these all create a slippery or powdery barrier that the adhesive simply cannot cling to. The patch slides, lifts at the edges, and either falls off during the day or sits there uselessly without drawing at the spot underneath.
This is also why the “after makeup” approach is not a shortcut you can take. It feels intuitive to finish your face and then pop a patch on as a final touch, but a patch applied over a full face of makeup will peel away within the hour and will not treat the blemish at all. You would be wearing a sticker, not a treatment. The order is not a matter of preference or style. It is a functional requirement of how the patch works.
So the sequence to internalise is straightforward. Start with a clean, bare face. Our Salicylic Acid Cleanser is a sensible first step here, because it gives you a genuinely clean, non-greasy base, which is exactly what the patch needs to grip. Rinse, then pat the target area completely dry, because even a film of water can weaken the seal. Apply the patch to the spot while the skin there is bare. Then, and only then, carry on with your usual skincare and makeup around the patch, keeping product off the patch itself where you can. We will get to the finer points of that in the application and layering sections.
It is worth drawing a quick distinction between how you might use a patch overnight versus during the day, because the “before or after makeup” question really only applies to daytime wear. Overnight, there is no makeup involved at all, so you simply apply the patch to clean, dry, bare skin before bed and let it work uninterrupted for hours. That is the setting where the patch gets the most undisturbed contact and the strongest draw. Daytime wear under makeup is a slightly different job: it is about discreet treatment while you go about your day, treating the spot quietly rather than maximally. Both are valid. The bare-skin overnight wear is the deeper treatment, and the under-makeup daytime wear is the convenient, invisible one.
One more practical note on the bare-skin rule. If you have a full skincare routine with serums and moisturiser, do not abandon it, just route it around the patch. Cleanse first, place the patch on the spot, then apply your other products to the rest of your face while keeping them clear of the patch itself. That way the skin everywhere else gets what it needs, and the patch gets the clean, dry contact it needs. Trying to force skincare under the patch is the single most common reason patches fail, and it is entirely avoidable.
Now that the order is clear, the next step is the technique itself: exactly how to apply the patch so it sits flat, seals properly, and all but vanishes before your makeup goes anywhere near it.
How to Apply a Pimple Patch So It Stays Invisible Under Makeup (Step by Step)
Applying a patch well is quick, but a few small details make the difference between one that disappears under makeup and one that announces itself. Here is the method, step by step. This is also the direct answer if you have been searching for how to apply a pimple patch, because the same technique gives you the best result whether or not makeup is going on top.
-
Cleanse and fully dry the area. Wash your face, then make sure the spot and the skin immediately around it are completely dry. No serum, no oil, no moisturiser and no sunscreen directly under where the patch will sit. Any residue, even moisture from rinsing, will stop the patch gripping. Dry skin is non-negotiable.
-
Choose the right size patch for the spot. Pick a patch that comfortably covers the whole blemish with a little clean skin to spare around the edge. Too small and the edges will sit right on top of the raised area, which makes them catch and lift. A patch that extends slightly onto flat, clean skin seals far more securely and is far easier to conceal.
-
Apply with clean, dry fingers or tweezers, and press from the centre outwards. Peel the patch from its backing without touching the adhesive more than you have to. Place it squarely over the spot, then press gently from the centre outwards. This pushes out any trapped air and seals the edges down flat against the skin. Edges that are properly sealed are the ones that stay invisible; edges with a pocket of air underneath are the ones that peek through foundation.
-
Leave it a minute to grip before any makeup goes near it. Give the adhesive a short moment to bond with the skin. A minute is plenty. Rushing straight into makeup is a reliable way to drag an edge loose before it has even had a chance to settle.
-
Apply skincare and makeup around, not under, the patch. With the patch sealed and settled, carry on with the rest of your face. Keep products off the patch itself and work them around it. The detailed layering technique for foundation and concealer comes in the next section.
That is the whole method. It takes under two minutes once it becomes habit, and the payoff is a patch that stays put all day and sits so flat you forget it is there. Because our Invisible Pimple Patches are ultra-thin and virtually invisible on all skin tones, a properly sealed patch essentially melts into the surface of the skin, giving your makeup a smooth, barely-there base to sit on.
A reasonable question at this point is how long to leave it on. Our patches can show visible results in around four hours, which is why they work so well for daytime wear under makeup. You put one on in the morning, go about your day, and it is quietly working the whole time. For a deeper, undisturbed draw, overnight wear on bare skin is ideal. For discreet daytime treatment, a patch under makeup gives you several hours of gentle work while you get on with everything else. You can swap a patch for a fresh one during the day if you want to keep the draw going, and because a Pack of 22 gives you plenty to play with, there is no reason to make a single patch last beyond its useful life.
A couple of extra pointers worth keeping in mind. Resist the urge to keep pressing and poking at the patch once it is on, because fiddling is what works an edge loose over time. And always start from genuinely clean hands, because transferring oil from your fingers to the adhesive weakens the bond before the patch even reaches your face. Small things, but they add up to the difference between a patch that lasts and one that lifts.
With the patch sealed, settled and all but invisible, the fun part begins: building your makeup over the top so that both the patch and the makeup look flawless.
How to Put Makeup Over a Pimple Patch Without It Peeling or Piling
Yes, you can absolutely put makeup over a pimple patch, including foundation, concealer and powder. The question is never really whether you can, but how to do it so the patch does not lift and the product does not pile up into a visible ridge around the edge. The technique is simple, and once you have it, it becomes second nature.
The golden rule is to dab and press, never swipe or rub. A swiping motion with a brush or sponge drags across the surface of the patch and catches its edges, which is exactly what you do not want. A pressing motion, by contrast, deposits product onto the patch and the surrounding skin without pulling at it. Think of it as stamping colour on gently rather than painting it across. Build your coverage in thin layers, pressing each one into place, rather than trying to cover everything in one thick pass. Thin, pressed layers blend into one another and sit flat; one heavy layer sits on top and piles at the edge.
Your choice of tool makes a real difference here. A slightly damp makeup sponge, bounced and pressed gently over the patch, is one of the best ways to lay product down without disturbing it. The give in the sponge means it moulds to the shape of the area and presses product in rather than dragging it off. A soft, flat brush used with a light stippling or pressing motion works well too. What you want to avoid is a firm brush used in brisk back-and-forth strokes, because that is precisely the action that lifts an edge. Once you are happy with the coverage, set it very lightly with a small amount of powder, again pressed rather than swept, to lock everything in place and stop it shifting through the day.
Where you put your moisturiser matters just as much as how you put your makeup on. Hydrate the rest of your face first and give it a moment to absorb before you start your base, but keep moisturiser off the patch itself. Our Omega Water Cream is a good partner here, because it is a lightweight, oil-free, water-based moisturiser that sinks in quickly and sits well under makeup. A cream that absorbs cleanly means your foundation goes on smoothly over the surrounding skin without sliding, while the patch stays dry and sealed where it needs to be. The trick throughout is always the same: the skin around the patch gets the full routine, and the patch itself stays product-free underneath.
Here is a quick order of operations for a clean daytime look with a patch in play:
- Cleanse and dry, then apply the patch to the bare spot and let it seal.
- Moisturise the rest of the face, keeping product off the patch, and let it absorb.
- Apply foundation around the area, then press a thin layer gently over the patch.
- Press concealer on top of the patch and blend the edges outward by patting, not rubbing.
- Set lightly with a little powder, pressed into place, to lock it all down.
At the end of the day, removal should be just as gentle as application. Lift the patch slowly from one edge rather than ripping it off, then cleanse your face as usual. Taking an edge up carefully avoids tugging at the skin or the spot underneath, and a proper cleanse clears away both the day’s makeup and anything the patch has drawn out.
It is only fair to set a realistic expectation. A very raised, prominent spot may still show a little texture under makeup, because no patch can instantly erase a bump that is physically sticking up from the skin. What the patch does is flatten the spot over time, so with each wear the area becomes smoother and easier to conceal. The patch is working with you, not performing a magic trick, and the smoother the spot gets, the more seamlessly your makeup sits over it.
If you want a broader deep-dive into getting skincare and makeup to play nicely together across your whole routine, we have a companion read packed with ideas in the ultimate hacks for skincare meets makeup. It is the natural next step once you have the patch-under-makeup technique down.
Even with the right method, a few small slip-ups can undo all your good work, so let us look at the mistakes that most often make a patch show through.
Common Mistakes That Make a Patch Show Through Makeup
Most patch-under-makeup disasters come down to a handful of avoidable errors. The good news is that each one has a simple fix, and once you know what to watch for, an invisible finish becomes the rule rather than the lucky exception. Here are the culprits, paired with the solutions.
Applying the patch over skincare, oil or other products. This is the big one, and it is worth repeating because it causes more failures than anything else. If you put a patch over serum, facial oil, moisturiser or any other product, it has nothing clean to grip and it will lift. The fix is to always patch onto bare, clean, dry skin first, then route the rest of your routine around it. Prep the spot before you apply anything else there, and if you use a sun protection step, keep it clear of the patch area and let it absorb elsewhere before you layer makeup.
Choosing a patch that is too small. A patch that only just covers the spot puts its edges right on the raised part of the blemish, where they are easy to catch and lift, especially when a brush passes over them. The fix is to size up slightly so the patch sits on flat, clean skin around the spot. That border of clean contact is what keeps the seal strong and the edges flat.
Rubbing makeup on in strokes instead of pressing. Swiping a brush or sponge back and forth drags at the patch and peels an edge loose. The fix is to dab and press every product on top of the patch, building thin layers, so you lay colour down without pulling at the surface.
Over-layering heavy product on top. Piling thick foundation, concealer and powder over the patch creates a mound that piles up at the edges and becomes more visible, not less. The fix is restraint: a thin pressed layer of base, a little concealer, and a light dusting of powder is usually all it takes to conceal a well-flattened spot.
Peeling and re-sticking the same patch. Lifting a patch to check on it and then pressing it back down weakens the adhesive and ruins the seal, so it will not sit flat or work properly afterwards. The fix is to leave it alone once it is on, and if it genuinely needs replacing, use a fresh one rather than reusing the old.
Picking at the spot before patching. Squeezing or picking at a blemish before you patch it makes the area more raised, more red and more irritated, which makes it harder to conceal and slower to settle. The fix is to resist the urge entirely, patch the spot as it is, and let the hydrocolloid do the drawing instead of your fingers.
If you want to start every one of these from the cleanest possible base, a proper first cleanse sets you up well. Our Salicylic Acid Cleanser gives you a genuinely clean, non-greasy surface, which is the foundation that every other step here depends on.
The reassuring takeaway is that none of these mistakes are difficult to avoid. Because our patches are ultra-thin and virtually invisible to begin with, you are starting from a strong position, and all these fixes are really just small habits that keep the patch sitting the way it is designed to. Get the base clean, size up, press rather than rub, go light on the layers, and leave the patch alone once it is on, and a visible patch becomes a thing of the past.
Once the technique and the troubleshooting are in hand, it is worth zooming out from the single spot to the bigger picture, because a patch works best as part of a simple, supportive routine.
Building a Simple Routine Around Your Patch
We believe you do not need more products, you need a simpler, clearer routine. A patch is a precision tool for an individual spot, but it lives inside a wider rhythm of looking after blemish-prone skin. Keep that rhythm uncomplicated and the patch has far less work to do. The whole thing boils down to four gentle steps: cleanse, treat, hydrate, and patch the spot. That is it. No fifteen-step regime, no shelf of half-used bottles, just a clear, repeatable routine that supports your skin and gives the patch a clean stage to perform on.
Start with the cleanse. A non-stripping, salicylic-based cleanser is a sensible daily choice for blemish-prone, oily or combination skin, because it clears away excess oil and the day’s grime without leaving skin tight or raw. Our Salicylic Acid Cleanser, around £14, does exactly this job, and as we have seen throughout, a proper cleanse is also the very thing that lets a patch grip. The cleanse and the patch are quietly connected: look after the first and the second works better.
Next, treat the wider breakout. A patch handles one spot beautifully, but if you tend to get clusters or recurring blemishes across an area, a targeted serum does the broader work. Our 360 Skin Clearing Serum, around £16, is designed to help with spots before, during and after they appear, which makes it a useful everyday step for skin that is prone to breakouts rather than the odd one-off. Think of the serum as the general support and the patch as the specialist you call in for a particular spot.
Then hydrate. It is a myth that blemish-prone or oily skin should be left dry, and skipping moisturiser often backfires by prompting the skin to produce more oil. The key is to choose something light. Our Omega Water Cream, around £14, is an oil-free, water-based moisturiser that absorbs quickly and sits well under makeup, which is precisely what you want when a patch and a full face are also in the mix. Hydrated skin around the patch means smoother makeup and a happier complexion overall.
Finally, the spot step: the patch itself on the individual blemish, applied exactly as described earlier. Our Invisible Pimple Patches, £9 for a Pack of 22, are the targeted finish to the routine, the step you add on the days a particular spot needs direct attention. On days without a spot you simply skip it; on days with one, you reach for a fresh patch and carry on with your makeup as normal.
Notice what this routine is not. It is not a long, intimidating list of actives layered until your skin cannot tell what is happening. It is four clear steps, each with a job, each supporting the next. We would always rather you understood why each step is there than bought something because the label promised the world. Educate first, sell second. A patch is not a cure-all, a serum is not a miracle, and a moisturiser is not optional. Together, used consistently and sensibly, they give blemish-prone skin a steady, calm routine to settle into.
The Bottom Line on Wearing Pimple Patches Under Makeup
So, can you wear pimple patches under makeup? Yes, confidently and reliably, as long as you get the order and the technique right. Patch first on clean, dry skin, let it seal, then press your makeup on top and around it, and sidestep the common mistakes like applying over skincare, sizing too small, or rubbing instead of pressing. Because our patches are ultra-thin and virtually invisible on all skin tones, you genuinely can treat and conceal a spot at the same time, with no visible lump and no peeling edge. That is the whole promise in a sentence. We believe in clear guidance, proven ingredients and real results, which is exactly what a patch, used well, delivers.
Ready to treat and conceal in one quiet step? Shop our Hydrocolloid Invisible Pimple Patches, £9 for a Pack of 22, and get a virtually invisible patch that works while it hides under your makeup.
Frequently Asked Questions
Got a question?
Our askINKEY team are a friendly bunch of skincare experts with deep product knowledge and zero judgement. Whether you're an ingredient obsessive or just starting out, we'll make it make sense. No question too big. No question too small. We Give A Care, Every Day.


