



How To Prep Skin Before Makeup: Order, Wait Times and What To Skip
Wait about 60 seconds between skincare and makeup. Here's the full skin prep order, wait times by skin type, and what to skip before you apply.
Author
askINKEY skincare advisor
Published
22 August, 2026
Time to read
18 minutes
Knowing how to prep skin for makeup comes down to two things: the order you apply your products in, and how long you leave between each one.
As a general rule, wait around 60 seconds between each skincare layer, or until the product no longer feels tacky when you touch it. Sunscreen needs longer, closer to two to five minutes, before makeup goes on top.
That is the short answer. Here is why it matters. Makeup does not sit on top of nothing. It sits on skin, which means the condition of the surface underneath decides how your base looks when you apply it and how it behaves six hours later. Most of the problems people blame on their foundation, the pilling, the separating, the sliding, the patches that appear by lunchtime, start with what happened in the ten minutes before the foundation went on.
This guide covers the full method: the correct layering order, how long to wait at each stage, how to adapt your skin prep by skin type, what to leave out on a makeup day, how to fix pilling when it happens, and how to prep for a long day or an event.
How Long To Wait Between Skincare and Makeup
This is the question we get asked more than any other on live chat, and it is the one most skincare guides skip entirely. They tell you what to apply. They rarely tell you when to move on.
Here is the rule, expanded.
Allow roughly 60 seconds between each skincare layer. Allow two to five minutes after sunscreen before you begin makeup. Those two numbers will get you most of the way there on most days with most products.
But the clock is a rough guide, not a law. Which brings us to the more reliable method.
The touch test beats any stopwatch
Press a clean fingertip gently to your cheek. If it feels tacky, or your finger drags across the skin, the layer has not finished setting. If it feels smooth and dry to the touch, move on.
That is the whole technique. It takes two seconds, it costs nothing, and it works across every product you own regardless of what the label says or how much you applied. A generous layer of a rich cream will need longer than a light mist of essence. A humid bathroom will slow everything down. A dry, air-conditioned room will speed it up. No fixed number survives all of those variables. Your fingertip does.
We are being deliberately honest here, because there is no single clinical number that applies to every product on the market. Absorption depends on the formula, the amount you use, your skin’s own condition and the environment you are standing in. Anyone who gives you one universal number for everything is guessing. The touch test is the more reliable instrument, and it is the one our advisors have been recommending for years.
askINKEY advisor tip: Nine times out of ten, when someone tells me their skincare is causing their makeup to move, they are not using the wrong products. They are simply not giving them a minute to settle. Try changing nothing except the timing for a week before you change anything else.
Why waiting actually works
Every product you apply needs a moment to do two things: spread into a thin, even film across the skin, and let its water content evaporate or absorb so what remains is a stable layer.
Put the next product on before that has happened and you are effectively dragging wet product through wet product. The two do not layer, they mix. Then they get pushed around by your fingers, your brush or your sponge, and they gather into the small rolls and streaks everybody recognises and nobody wants. That is the mechanism behind balling, streaking and patchy coverage, and it is almost entirely a timing problem rather than a product problem.
Think of it like paint. Two coats applied properly look better than one thick coat. Two coats applied on top of each other while the first is still wet look worse than either.
Wait times at every step
Here is the full sequence with realistic timings. This is the block worth screenshotting.
- Cleanser. Do not wait. Apply your next step to damp skin, not dripping wet, just barely damp. This is one of the few places where speed genuinely helps.
- Toner or mist. 30 seconds. You are waiting for it to absorb with no wet sheen left on the surface.
- Treatment serum. 60 seconds. You are waiting until it is no longer tacky to the touch.
- Hydrating serum. 60 seconds. You are waiting until it sits smooth rather than slippery.
- Eye cream. 60 seconds. You are waiting for it to fully sink in around the socket, where concealer is about to go.
- Moisturiser. 60 seconds. You are waiting for it to set, with no pooling and no slip.
- SPF. 2 to 5 minutes. You are waiting for it to dry down and form its film. This is the longest wait in the routine and the least negotiable.
- Primer. 30 to 60 seconds. You are waiting for an even surface that feels either matte or grippy, depending on the formula.
Why sunscreen needs longer than everything else
Sunscreen is different from the rest of your routine because it is not just sitting on your skin, it is forming a protective film across it. That film needs time to set. Disturb it too early with a sponge or a brush and you disrupt the even layer that the protection depends on.
The American Academy of Dermatology’s guidance on applying sunscreen is clear that sunscreen needs time to absorb before you rely on it for protection. It is not a step you can rush and then immediately cover.
The Cleveland Clinic puts it plainly: “Give the sunscreen a few minutes to dry and sink into your skin before starting to put on any makeup. If you start the makeup process too early, you may undermine your sunscreen’s SPF.”
That last clause is the important one. Rushing your SPF does not just risk your makeup looking uneven. It risks the sunscreen not doing the job you applied it for.
If you have the luxury of time, more is better. Nebraska Medicine’s dermatology guidance suggests that if you will be indoors, you should apply moisturiser and sunscreen about 10 to 15 minutes before your foundation. Treat that as the ideal rather than the minimum. Two to five minutes is workable. Ten to fifteen is better. Zero is where the problems start.
What to do when you are in a rush
Realistically, some mornings you have four minutes, not fifteen. Here is how to spend them.
- Protect the SPF wait above all others. If something has to give, let it be the gap after your serum, not the gap after your sunscreen.
- Apply fewer layers rather than rushing more layers. Three products applied properly will always outperform six products applied on top of each other in ninety seconds. Drop the treatment serum. Drop the primer. Keep the cleanse, the hydration, the moisturiser and the SPF.
- Use the wait productively. Brush your teeth. Make coffee. Do your hair. The 60 seconds are only dead time if you stand still and watch them.
- Apply thinner. A thinner layer sets faster. If you are short on time, use slightly less product and press it in rather than slathering it on.
What happens if you do not wait at all
You already know, because you have seen it. Foundation that rolls into little balls along the jaw. A base that looks fine at 8am and separated across the nose and forehead by 11am. Concealer that creases under the eye within the hour. Patchy coverage that no amount of buffing fixes because the problem is not the buffing, it is what is underneath.
None of that is a sign you bought bad makeup. It is a sign the surface was not ready.
If you want the full context of a routine beyond makeup days, our Complete Skincare Guide walks through the whole thing from first cleanse to final step.
Timing only works if the order is right in the first place, so the sequence itself is where we go next.
The Correct Order To Prep Skin For Makeup, Step By Step
There are seven steps. They go in this order, every time, for every skin type.
1. Cleanse. 2. Treat. 3. Hydrate. 4. Eyes. 5. Moisturise. 6. SPF. 7. Prime.
The governing principle in one line: thinnest to thickest. Lighter products with smaller molecules go on first, so they are not blocked by heavier textures sitting on top of them. The Cleveland Clinic’s guide to the correct order of skin care products articulates this rule as cleanly as anyone. Apply a thick cream before a watery serum and the serum has nowhere to go.
Step 1: Cleanse
Start with clean skin. Always, and this includes mornings when you did not wear makeup the day before.
Overnight your skin produces oil, sheds cells and holds onto whatever you applied before bed. Layering a fresh routine on top of that residue means nothing sits properly, and it is one of the quieter reasons a base can look uneven for no obvious reason.
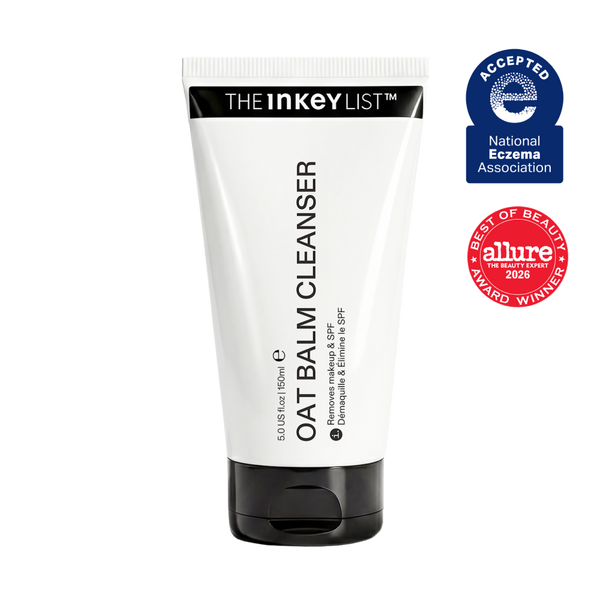
For dry, sensitive or irritated skin, the Oat Cleansing Balm 150ml (£15.00) cleanses without stripping. Colloidal oatmeal is the reason it feels as comfortable as it does, and skin that has not been stripped is skin that gives makeup something to hold onto.
For oily or congested skin, the Salicylic Acid Cleanser works into the pore lining to clear the build-up that makes a base slide by midday.
Our advisors recommend a 60-second cleanse. Not because there is anything magic about the number, but because most people cleanse for around fifteen seconds and that is not long enough for the product to do what it was formulated to do. A minute of gentle massage genuinely changes the result.
If you wore makeup or SPF the day before, a double cleanse the previous evening matters more than anything you do in the morning. Our Guide to Double Cleansing covers the method.
Wait time: none. Move to the next step while skin is still damp.
Step 2: Treat
This is where any targeted step goes, while skin is clean and receptive and nothing is yet blocking the way.
On a makeup day, keep this step light. A morning before foundation is not the moment for your most demanding actives. What you want is something that improves the surface rather than something that challenges it.
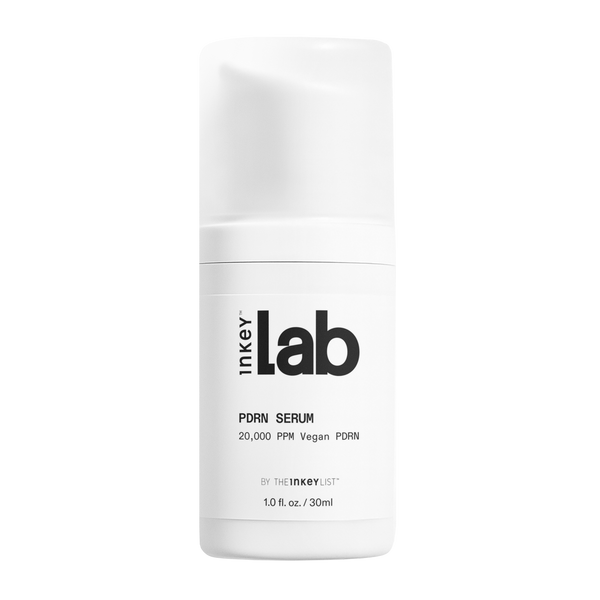
PDRN Serum earns its place here. It supports skin renewal and leaves the kind of smooth, glass-like finish that makes everything applied afterwards sit better. If PDRN is new to you, What is PDRN? explains it without the jargon.
Wait time: 60 seconds, or until it is no longer tacky.
Step 3: Hydrate
Hydration is the single biggest lever you have on how makeup sits. If you change one thing about your prep, change this.
Dehydrated skin is thirsty skin, and thirsty skin pulls moisture out of whatever you put on it, including your foundation. That is why a base can look beautiful at application and tight, patchy and clingy an hour later. The foundation did not change. The skin underneath drank it.
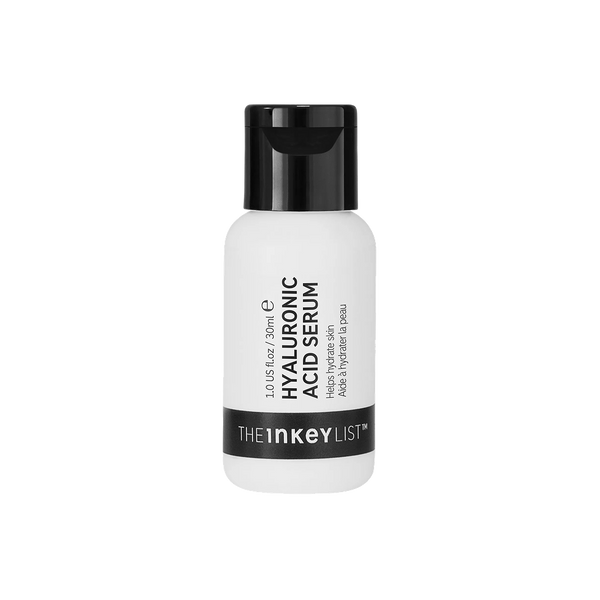
Hyaluronic Acid Serum (£12.00) applied to damp skin is the straightforward answer. Damp matters, because hyaluronic acid draws water toward the skin’s surface and it works better with water available to draw on. If the ingredient is new to you, What is Hyaluronic Acid? is a two-minute read.
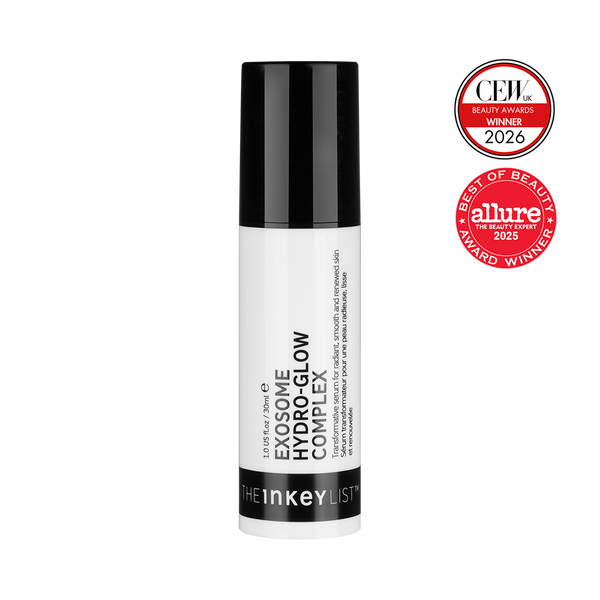
When you want radiance built into the base rather than painted on top of it, this is where Exosome Glow Serum(£20.00) sits. It is proven to deliver up to 12-hours of hydration**, and in testing, 100% saw more glowing skin, clinically proven*. The difference between glow that comes from the skin and glow that comes from a highlighter is visible from across a room, and this step is how you get the first kind. If you are curious about the ingredient itself, What are Exosomes? explains the category properly.
Wait time: 60 seconds, or until it sits smooth rather than slippery.
Step 4: Eyes
Eye cream before concealer, not after, and not skipped.
Concealer creasing is usually a dryness and puffiness problem rather than a concealer problem. The skin around the eye is thinner and drier than the rest of the face, and it moves constantly. Put a cream product onto a dry, slightly puffy surface that blinks ten thousand times a day and it will gather in the fine lines. That is physics, not a flaw in your concealer.
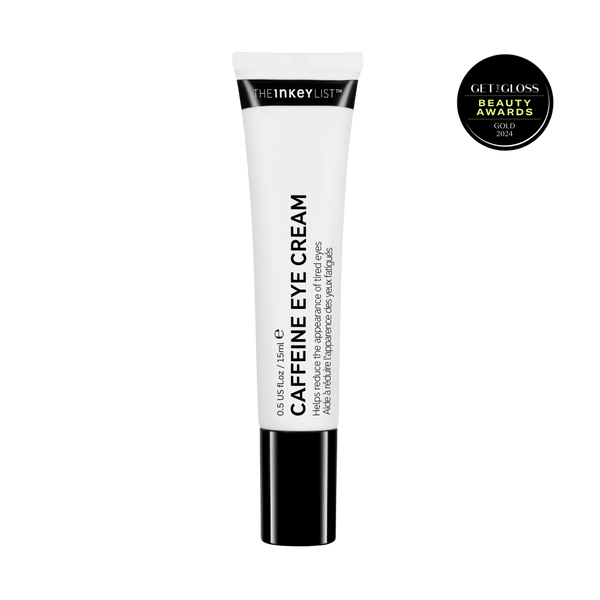
Caffeine Eye Cream (£12.00) addresses both parts of the problem, and it gives concealer a smoother, more even surface to sit on.
Wait time: 60 seconds. Make sure it has fully sunk in around the socket before concealer goes anywhere near it.
Step 5: Moisturise
Moisturiser seals the hydration you just applied and creates the final skin-level surface your makeup will actually meet.
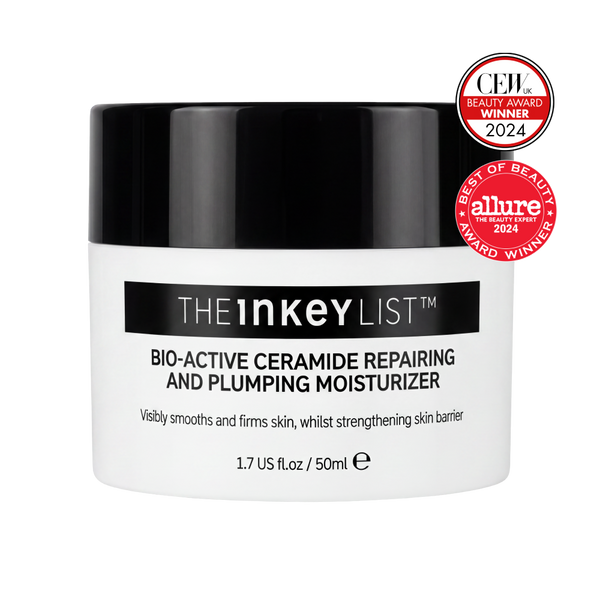
For dry or mature skin, Bio-Active Ceramide Moisturiser (£20.00) supports the barrier and leaves a subtly blurring finish that works genuinely well underneath a base. Ceramides are part of what holds the skin’s surface together, and a surface that is holding together is a surface makeup can grip.
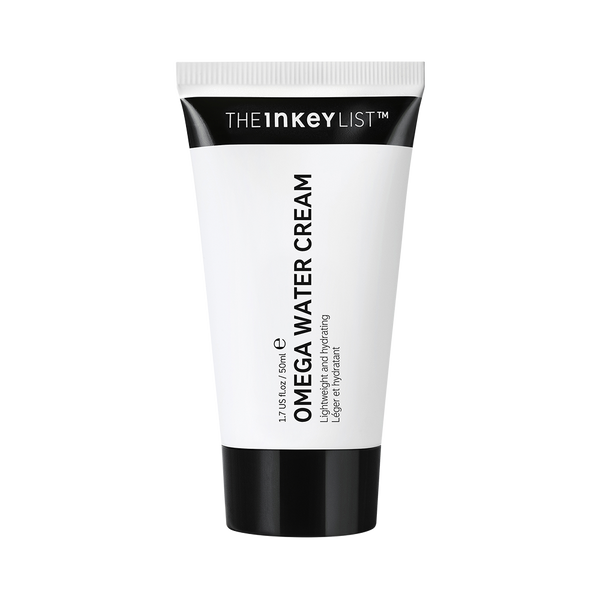
For oily and combination skin that still needs hydration without slip, Omega Water Cream delivers moisture in a lightweight texture that will not send your base sliding by mid-afternoon.
You can browse the full range in moisturisers.
Wait time: 60 seconds. It should feel set, with no pooling and no slip.
Step 6: SPF
Always after moisturiser. Always before makeup. This is the step people most often get backwards, and it is worth settling definitively.
The American Academy of Dermatology instructs applying sunscreen after your other skincare products and beneath makeup. JAMA Dermatology’s patient guide to sunscreen confirms the same sequence: moisturiser, then sunscreen, then makeup.
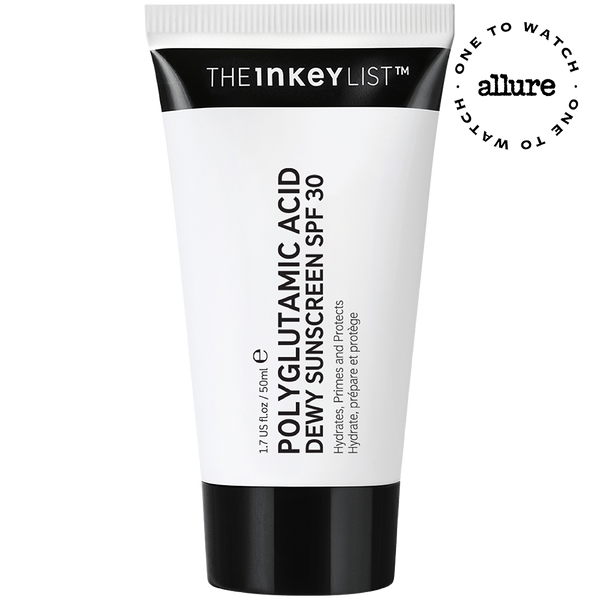
So if you have been putting SPF on before your moisturiser, or relying on the SPF in your foundation, this is the step to correct. Dewy Sunscreen SPF 30 is formulated to sit comfortably under a base, and What is SPF? covers the fundamentals if you want the reasoning in full.
Wait time: 2 to 5 minutes. Longer if you can spare it.
Step 7: Prime
Optional. Genuinely optional, and we would rather say so than sell you something you do not need.
If your moisturiser has done its job, a great many people do not need a separate primer at all. Primers solve specific problems: extreme shine, very visible pores, a base that will not stay put through a fourteen-hour day. If you do not have those problems, you are adding a layer for the sake of adding a layer, and every unnecessary layer is another opportunity for something to pill.
If you do use one, match it to your foundation. Which brings us to a rule worth locking in.
Wait time: 30 to 60 seconds.
The order and the timing work together
It is worth stating plainly, because people tend to learn one and ignore the other. The right order applied too fast still fails. The right timing applied in the wrong order still fails. You need both. Cleanse, treat, hydrate, eyes, moisturise, SPF, prime, with about a minute between each and a longer pause after the sunscreen.
The order stays the same for everyone. What you put in each slot is where it gets personal, and that is where most prep advice falls down.
Skin Prep For Oily, Dry, Combination and Sensitive Skin
The seven steps do not change. The textures do.
That is the entire principle of this section. Nobody needs a different order. What an oily skin type needs is lightweight hydration that will not add slip. What a dry skin type needs is grip and layered moisture. Same slots, different fills.
If you are not certain which category you fall into, What’s Your Skin Type? will sort it out in a couple of minutes, and it is worth doing properly because a surprising number of people are prepping for the skin they had ten years ago.
Oily and combination skin
The instinct with oily skin is to strip it and mattify it before makeup, on the theory that less oil means longer wear.
It backfires, reliably.
Strip the skin and you dehydrate it. Dehydrated skin frequently responds by producing more oil, not less, which means you have created the exact problem you were trying to prevent, plus a compromised surface for your base to sit on. Makeup breaks down faster over stripped skin than over balanced skin. This is one of the most common mistakes we see, and correcting it usually improves someone’s makeup wear more than any product swap would.
askINKEY advisor tip: Stop stripping your skin before makeup. I know it feels counterintuitive when you are shiny by noon, but dehydrated skin makes more oil, and makeup breaks down faster on it. Hydrate properly and the shine usually settles down on its own within a couple of weeks.
The routine that works:
- Cleanse with Salicylic Acid Cleanser. It clears congestion from inside the pore rather than just degreasing the surface.
- Treat with Niacinamide Serum to help control shine and the look of pores. What is Niacinamide? explains why this ingredient shows up in so many oily-skin routines.
- Moisturise with Omega Water Cream, which is oil-free and gives you hydration without the slip that sends foundation travelling.
The niacinamide plus Omega Water Cream pairing is an advisor favourite for a reason. It is the combination we recommend most often for a base that actually holds through a working day.
For combination skin specifically: you are allowed to prep different zones differently. This is not cheating and it is not overcomplicating things. Lighter texture through the T-zone, richer on the cheeks. Most people with combination skin are prepping their whole face for whichever zone annoys them most, and then wondering why the other zone misbehaves.
Watch out for: over-mattifying, alcohol-heavy toners, and skipping moisturiser entirely.
Dry skin
Foundation clings to dry patches. It finds every flake, settles into it, and by mid-morning the texture you were trying to cover is more visible than it was before you started.
The fix is layered hydration, not more foundation. Adding coverage to a dry patch makes it more obvious, every single time.
The routine that works:
- Cleanse with Oat Cleansing Balm 150ml, so the first step of your day does not remove the oils you are about to spend four steps replacing.
- Hydrate with Hyaluronic Acid Serum applied to damp skin. The damp part is not optional for dry skin, it is the whole mechanism.
- Moisturise with Bio-Active Ceramide Moisturiser. Its subtly blurring finish sits particularly well under makeup, and ceramides support the barrier that dry skin is usually short of.
The sequencing matters here more than for any other skin type. Hydrating serum on damp skin, then a ceramide moisturiser to hold it there, is a fundamentally different result from either product used alone.
Watch out for: exfoliating to remove flakes right before makeup. It is the obvious move and it is the wrong one. We will come back to why.
Sensitive or reactive skin
Keep the prep routine short and keep it predictable.
Makeup day is not the day to introduce anything new. Not a new serum, not a new acid, not the sample that came with your last order. If skin reacts, it will do so under your foundation, in public, several hours from home. Test new products on a day when nothing is riding on the outcome.
The routine that works:
- Cleanse with Oat Cleansing Balm 150ml. The colloidal oatmeal helps visibly reduce redness, which is a meaningful head start before any base goes on.
- Support the barrier with Ectoin HydroBarrier Serum for comfort and barrier support. Comfortable skin behaves more predictably under makeup than skin that is quietly complaining.
- Keep the total number of steps low. Four well-chosen products beat seven hopeful ones.
Watch out for: fragrance, brand-new actives, and the temptation to add “just one more thing” because there is an event.
Blemish-prone skin
Prep around a breakout rather than burying it.
The default approach is to pile coverage onto a blemish, which usually draws more attention to the texture and does nothing for the blemish itself. There is a better way, and it is genuinely underused.
Hydrocolloid Invisible Pimple Patches sit flat and invisibly under makeup. You can treat and conceal at the same time, which means the day is not a write-off for the blemish and the base still looks smooth. Apply the patch onto clean, dry skin before your other steps, prep around it, and apply your base over the top with a light hand.
Browse more options in blemishes and breakouts, or use the breakout analyzer if you want a read on what is actually going on.
Watch out for: heavy spot treatments immediately before makeup. Most of them are designed to dry down hard, and makeup does not layer over that well at all.
If your concern sits outside these four
Plenty of people’s main concern is not their skin type. It is pigmentation, or texture, or fine lines, or something seasonal. Our guide to the 10 most common skin concerns is a better starting point if that describes you, and the prep principles here still apply on top of whatever routine you land on.
Knowing what to use matters. Knowing what to leave out on a makeup day matters just as much, and it is the part almost nobody talks about.
What To Skip Before Makeup
Every guide tells you what to apply. Very few tell you what to remove, which is strange, because removing the wrong product from your morning is usually faster and cheaper than adding the right one.
None of this is about restriction. It is about giving your makeup a surface it can actually hold onto. Some products are excellent and simply belong at a different time of day.
Heavy occlusives and thick balms
Anything designed to seal moisture into the skin will also, by definition, stop makeup gripping to it. That is not a design flaw. That is the product doing exactly what it was made to do.
Thick occlusive balms create a slick, sealed film. Foundation applied on top of that film has nothing to bond with, so it moves, slides and separates. If you have ever applied a rich balm and then wondered why your base would not stay put, this is why.
Skip it before makeup. Use it at night instead, where it can seal in your evening routine for eight hours undisturbed. That is where it earns its money.
Layering too many film-forming products in quick succession
Some products form a film as they dry. Silicone-based primers do it, many sunscreens do it, plenty of serums do it. A film-forming product on its own is usually fine. Three of them stacked in ninety seconds is where trouble starts, because each one is trying to form its own layer and they end up competing for the same surface.
Fewer layers, better applied. That is the whole fix. If you use a film-forming primer and a film-forming sunscreen and a film-forming foundation, something has to give.
Retinol in the morning
Retinol is a night step. There is very little debate about this.
Applying it before makeup risks irritation, does not suit daytime layering, and wastes the ingredient’s potential in a routine that is about to be covered up and exposed to daylight. Move it to the evening, where it belongs, and your morning gets simpler at the same time.
Our guide on what not to mix with retinol covers the combinations to avoid, and What is Retinol? is the starting point if the ingredient is new to you.
Exfoliating right before makeup
This is the one people get wrong with the best intentions, particularly dry skin types trying to buff away a flaky patch before foundation.
Freshly exfoliated skin is more permeable and more prone to looking flushed or feeling sensitive under a base. You have removed the surface layer and then immediately covered the result with foundation and worked it in with a brush. The flakes may be gone, but you have traded them for redness and reactivity.
Move acid exfoliation to the night before, at absolute minimum. Ideally two nights before an important day. Your skin gets time to settle, and you still get the smoother surface you were after.
Applying too much product
Volume is the enemy of a good base.
Three well-absorbed layers will outperform six competing ones every time. This is advisory experience rather than a laboratory finding, but it is consistent enough across the conversations we have that we will state it plainly: when someone describes a base that rolls, the amount of product is usually part of the story. More product means a thicker film, and a thicker film has more material available to gather and roll under friction.
A pea-sized amount of moisturiser is a pea-sized amount for a reason. Doubling it does not double the benefit. It mostly doubles the drying time.
Rich facial oils immediately before foundation
Facial oils are wonderful. They break down most makeup bases.
Oil and the emulsifiers in a typical foundation do not want to sit as separate layers, so what you get is a base that separates, slides and pools in the places you least want it to. If your skin needs comfort in the morning, a hydrating serum and a well-matched moisturiser will deliver it without the same consequence.
Skip this before makeup. Do this instead:
- Instead of a thick occlusive balm, use a ceramide moisturiser like Bio-Active Ceramide Moisturiser.
- Instead of a facial oil, use Hyaluronic Acid Serum on damp skin.
- Instead of morning retinol, move it to your evening routine.
- Instead of morning exfoliation, exfoliate the night before.
- Instead of six layers, use three and give each one its minute.
askINKEY advisor tip: If your base has never behaved and you have tried everything, try subtraction before addition. Take two products out of your morning for a week. Most people find the problem was never the thing they were missing.
Get the skip list wrong and you end up with the single most common complaint in the whole of makeup prep. It is frustrating enough, and misunderstood enough, to deserve its own section.
Why Your Makeup Pills or Separates, and How Prep Fixes It
Pilling is those small balls or flakes that roll off the skin when you apply or blend your makeup. You know the ones. They gather on the brush, they collect along the jaw and the sides of the nose, and once they start there is no rescuing that patch without starting again.
Here is the reassuring part: it is not your skin shedding. It is product layers failing to bond, which is a fixable problem with a small number of identifiable causes.
Cause one: not enough time between layers
The most common cause by a distance.
Wet or tacky product, plus friction from a brush or a sponge, equals rolling. You are not applying makeup to a set surface, you are pushing a semi-liquid layer around and it is gathering as it goes.
Go back to the touch test. Press a clean fingertip to your cheek. Tacky means wait. Smooth and dry means go.
Cause two: incompatible bases
Water-based products and silicone-based products tend to separate rather than blend, in either direction.
In plain English: silicones are smoothing ingredients that sit on the surface and fill in texture. They are what gives many primers that velvety, slightly slippery feel. Water-based products want to absorb into the skin. Put a water-based product on top of a silicone film and it beads up rather than spreading, the way water beads on a waxed car.
You do not need to memorise ingredient lists to solve this. Just notice which of your products feel silky and slippery and which feel watery, and try to keep consecutive layers in the same family.
Cause three: too much product
Thicker layers have more material available to roll. This follows logically from the friction problem: whatever is sitting on the surface is what gets pushed around, and there is simply more of it to gather.
Cause four: surface texture
Skin that is dry and flaky gives makeup an uneven surface to sit on. That is a hydration problem rather than a makeup problem, and no change of foundation will solve it.
There is good research behind this. The peer-reviewed study Understanding the causes of skincare product pillingfound that volunteers who pilled more frequently had measurably lower skin hydration and lower sebum, alongside higher skin pH and smoother measured skin texture. In other words, the state of your skin is a genuine variable in whether your products pill, not just an excuse.
That finding is worth sitting with, because it reframes pilling as something you can address in the days before rather than only in the moment.
The counterintuitive finding worth knowing
In the same published study, of all the pilling events observed after sunscreen was applied, 98.9% were improved, meaning reduced or resolved, once foundation was layered on top. Among the subset of volunteers who pilled when sunscreen was applied to clean skin, every single one showed a reduction in pilling intensity after a base product and foundation were applied over it.
Read that again if you have ever abandoned your SPF because it pilled.
The pilling you see at the sunscreen stage very often does not survive the foundation stage. Which means the instinct to strip everything off and start again, or worse, to skip the sunscreen tomorrow, is frequently the wrong call. Carry on. In the overwhelming majority of cases observed, it resolved.
This matters more than a tidy makeup finish. Sunscreen is the highest-value step in most morning routines, and abandoning it over a cosmetic annoyance that usually corrects itself is a genuinely bad trade.
Press, do not rub
The same study looked at how people applied their products and found that rubbing, in both circular and linear motions, produced the most pilling events. Patting and pressing produced fewer.
That is peer-reviewed backing for something our advisors have said for years.
askINKEY advisor tip: Press, do not rub. Every product in your routine, including your makeup. Rubbing creates the friction that rolls product into pills, and pressing gets the same product into the same place without the drag. It feels slower for about two days and then it feels normal.
One honest note about the research
Worth being straight about this, because we would rather be accurate than convenient. That study used a fixed, standardised amount of product at every application and did not vary the quantity, nor did it systematically test waiting times between layers or map out which textures are chemically incompatible.
So when we say too much product and rushed layering cause pilling, that is drawn from advisory experience and the mechanics of what pilling is, not from that paper. The friction finding, the skin-condition finding and the foundation finding are the study’s. We are not going to blur the line between the two.
It also means the touch test stands as a practical heuristic rather than a clinically fixed interval, which is exactly how we have presented it.
The fix list
- Wait longer. Add 30 seconds to every gap and see what changes. This alone solves it for most people.
- Use less. Cut every product back by about a third for a week.
- Keep textures consistent. Try not to alternate between silky-silicone and watery-hydrating layers.
- Press rather than rub. Both in skincare and in makeup application.
- Hydrate the night before. Surface texture is built overnight, not in the four minutes before you leave.
For an immediate rescue when makeup is clinging to a dry patch mid-application, HydroSurge Dewy Face Mist revives the surface and lets you press the product back down. For the longer-term fix on texture-related pilling, Bio-Active Ceramide Moisturiser addresses the hydration and barrier side of the problem, and its blurring finish helps in the meantime. You can compare options across moisturisers.
Everyday prep is one thing. A fourteen-hour day, a wedding, or an event where there will be photographs asks a bit more of your base.
Prepping Skin For Long-Wear Makeup and Events
The best event prep does not happen on the morning of the event. It happens in the days before it.
This is the part most people get backwards. They do their normal routine for three weeks, then panic on the day and add four unfamiliar products an hour before they leave. That is the highest-risk version of every decision available to them.
Start the night before
A hydrating, barrier-supporting routine the evening before will do more for your base than anything you can apply on the day.
The night before:
- A thorough double cleanse, so nothing from the day is left on the skin. The Guide to Double Cleansing has the method.
- A hydrating serum, applied to damp skin.
- A supportive moisturiser to hold that hydration overnight.
- Nothing new. Nothing potentially irritating. No first-time actives, no strong exfoliation, no experiments.
That last point is the one to underline. The night before an event is the single worst time to try a product for the first time, and it is when people most often do it.
The morning of:
- Allow more time, not more product. This is the whole philosophy in six words.
- Extend every wait to the full 60 seconds rather than the rushed thirty.
- Give SPF the longer five minute window, not the two minute one.
- Use the same products you always use. Familiar skin behaves predictably.
Building glow in the run-up
If you are planning ahead, and an event is the one occasion when most people genuinely are, this is where a radiance step pays off.
Exosome Glow Serum (£20.00) is worth starting roughly two weeks out rather than on the day, because it is formulated for clinic worthy rejuvenated skin in 14 days*. Beginning a fortnight before means the glow is established by the time it matters, rather than depending on a single application the morning of. It also helps support natural collagen production.
Two weeks of consistent use is a more reliable route to a glow-boosting result than anything applied in a hurry on the day. If you want to understand the ingredient before you commit, What are Exosomes? covers it.
For the glass-skin finish under a dewy base, PDRN Serum is the one to add on the morning itself. It smooths the surface in a way that reads beautifully in photographs, and What is PDRN? explains why.
If you are assembling a full prep routine from scratch, Build Your Own Routine lets you put the sequence together in one go.
Touch-ups without ruining the base
Long days require maintenance. Most people do it wrong and end up with a heavier, patchier face by evening than they started with.
- Mist to revive, do not powder to fix. A light mist of HydroSurge Dewy Face Mist brings a tired base back to life. Powder on top of a base that has been on for eight hours mostly adds texture.
- Blot, do not pile on. Blotting removes excess oil without adding product. Powder over oil creates the thick, cakey look everyone is trying to avoid.
- Pat, do not rub. Same principle as the morning. Any touch-up applied with friction will disturb what is underneath.
- Fix one area, not the whole face. Usually it is the T-zone or around the nose. Leave the parts that are still working alone.
An honest word about expectations
No prep routine makes makeup last indefinitely.
Heat, humidity, air conditioning, how much you touch your face, how much you talk, whether you cry at the speeches, and your own skin type all change the outcome. A twelve-hour wear claim on a product is a laboratory number, and your wedding in August is not a laboratory.
Good prep meaningfully extends how long your base looks its best and reduces how badly it degrades. It does not freeze your face at 9am. Anyone promising that is selling something, and we would rather you went in with realistic expectations and a blotting paper in your bag.
End the night properly
However good the prep was, the day ends with a proper cleanse. This is not the moment to fall asleep in a full face of long-wear makeup and SPF.
The Oat Cleansing Balm 150ml (£15.00) melts makeup and SPF in around 30 seconds, which is roughly the amount of effort available at 1am. Follow with a gentle second cleanse such as Milk Cleanser, or explore the options in cleansers.
Removing it properly is what protects tomorrow’s skin, and tomorrow’s skin is what your next base will be sitting on.
Everything above answers the main questions. Here are the quick ones people search individually.
The Method, In Short
Prepping skin before makeup is a sequence and a set of pauses, nothing more complicated than that. The order is cleanse, treat, hydrate, eyes, moisturise, SPF, prime. The rule is roughly 60 seconds between each layer, with two to five minutes after sunscreen. The test is whether the layer still feels tacky when you press a fingertip to it.
What we hope comes across is that prepping skin well is not about owning more products. It is about understanding what each layer is doing and giving it a moment to do it. The most transformative change most people can make to their base costs nothing and takes six minutes instead of two.
One last honest note. Skin changes with the season, with hormones, with climate and with age. The prep routine that works for you in February may need adjusting by July. Treat this as a framework to flex rather than a fixed prescription, and pay attention to what your skin is telling you.
Find The Right Prep Routine For Your Skin
If you are not sure which products belong in each of the seven steps for your skin type, our skincare quiz will match you to a routine in about two minutes. If you already know what you need and want to assemble the full prep sequence in one go, Build Your Own Routine is the faster route.
And if you would rather just ask a person, askINKEY is free, human, and available on live chat. No judgement, no jargon, and no pressure to buy anything.
Written by an askINKEY skincare advisor. Our askINKEY team of qualified skincare advisors answers thousands of questions every month on live chat, helping people build routines that suit their skin, their concerns and their budget. Every recommendation in this guide reflects the advice we give in those conversations.
\4-week clinical study of 26 people*
\*Clinical study of 31 people*
Frequently Asked Questions
Got a question?
Our askINKEY team are a friendly bunch of skincare experts with deep product knowledge and zero judgement. Whether you're an ingredient obsessive or just starting out, we'll make it make sense. No question too big. No question too small. We Give A Care, Every Day.


